
Chicken wings are a popular appetizer or main course option for any occasion. Whether you’re preparing for a backyard barbecue or a game day party, knowing how to properly cut and break down chicken wings is essential. By following a few simple steps, you can transform a whole wing into individual drumettes and flats, making them easier to cook and eat.
To begin, you’ll need a sharp knife and a cutting board. Start by locating the joint where the drumette (the upper portion of the wing) connects to the flat (the lower portion). You’ll notice a natural bend in the wing – this is the joint you’ll be cutting through. Place the wing on the cutting board with the drumette pointing up. Using your knife, make a clean cut through the joint, separating the drumette from the flat.
Next, you’ll want to separate the flat into two pieces. Flip the flat over so that the skin side is down and the tip is pointing up. Locate the joint in the middle of the flat. Using your knife, make a small cut through the joint. Then, using your hands or a towel for grip, apply pressure to the sides of the flat. This will cause the joint to break, and you’ll be left with two separate pieces of flat.
| Steps to Cut and Break Down Chicken Wings: |
|---|
| Step 1: Place the wing on the cutting board with the drumette pointing up. |
| Step 2: Make a clean cut through the joint, separating the drumette from the flat. |
| Step 3: Flip the flat over so that the skin side is down and the tip is pointing up. |
| Step 4: Make a small cut through the joint in the middle of the flat. |
| Step 5: Apply pressure to the sides of the flat until the joint breaks, separating the flat into two pieces. |
Now that you know how to cut and break down chicken wings, you can easily prepare them for any recipe or cooking method. Whether you’re grilling, frying, or baking, individual drumettes and flats cook more evenly and allow for easier seasoning and saucing. So the next time you’re craving chicken wings, try breaking them down yourself for a delicious and satisfying meal.
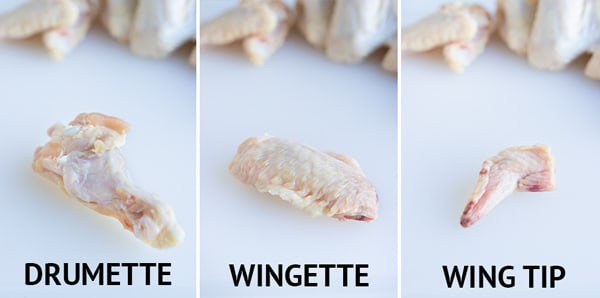
Understanding the Different Parts of a Chicken Wing
1. Drumette: The drumette is the thickest part of the wing and resembles a small drumstick. It is located closest to the body of the chicken and has a single bone running through the center. The meat on the drumette is tender and flavorful, making it a favorite part for many chicken wing lovers.
2. Flat: The flat portion of the wing is located between the drumette and the wingtip. It is long and flat, with two bones running parallel to each other. The meat on the flat is relatively lean and has a chewy texture. It requires thorough cooking to achieve tenderness.
3. Wingtip: The wingtip is the smallest and least meaty part of the wing. It is located at the end of the flat and consists mostly of skin and cartilage. While it doesn’t offer much meat, some people enjoy its crunchy texture and it can be used to make flavorful stock or broth.
| Part | Description |
|---|---|
| Drumette | The thickest part resembling a small drumstick. |
| Flat | The long, flat portion between the drumette and the wingtip. |
| Wingtip | The smallest part consisting mostly of skin and cartilage. |
Each part of the chicken wing has its own unique characteristics and flavors, and understanding these differences can help you prepare and enjoy chicken wings in various ways. Whether you prefer the tender and meaty drumettes, the chewy flats, or even the crunchy wingtips, there’s a chicken wing part to satisfy everyone’s taste preferences.
The Benefits of Cutting and Breaking Down Chicken Wings
One of the main advantages of cutting and breaking down chicken wings is the ability to customize their size and shape. By separating the wing into three parts – the drumette, flat, and tip – you can choose your preferred portion. This is particularly beneficial if you have personal preferences, such as preferring more meat on the drumette or wanting a flatter wing for a specific recipe. By having control over the size and shape, you can ensure that each piece is cooked exactly how you like it.
Another benefit of cutting and breaking down chicken wings is the versatility it offers in cooking methods. Whether you prefer to bake, grill, fry, or air fry your wings, breaking them down allows for even and consistent cooking. Depending on the recipe, you may want to separate the drumettes and flats, or keep them together for a different cooking technique. The ability to adapt the wings to your desired cooking method opens up a world of possibilities for flavor and texture.
| Benefits of Cutting and Breaking Down Chicken Wings |
|---|
| Customize the size and shape of the wings |
| Versatility in cooking methods |
| Saves money in the long run |
Lastly, cutting and breaking down chicken wings can save you money in the long run. Buying whole chicken wings and breaking them down yourself is often more cost-effective than purchasing pre-cut wings. Not only can you get more wings for your money, but you also have the option to use the wing tips for making stock or broth. By taking the time to cut and break down the wings yourself, you can maximize your budget while still enjoying delicious chicken wings.
In conclusion, cutting and breaking down chicken wings offers several benefits. From customizing the size and shape of the wings to the versatility in cooking methods, it gives you control over your chicken wing experience. Additionally, it can be a cost-effective option that allows you to make the most out of your budget. So, next time you’re in the mood for chicken wings, consider buying whole wings and breaking them down yourself for a personalized and satisfying culinary experience.
How to Properly Cut and Break Down Chicken Wings
1. Gather Your Tools
Before you start, make sure you have the necessary tools for the task. You will need a sharp knife, a cutting board, and a clean towel or paper towels for drying the wings.
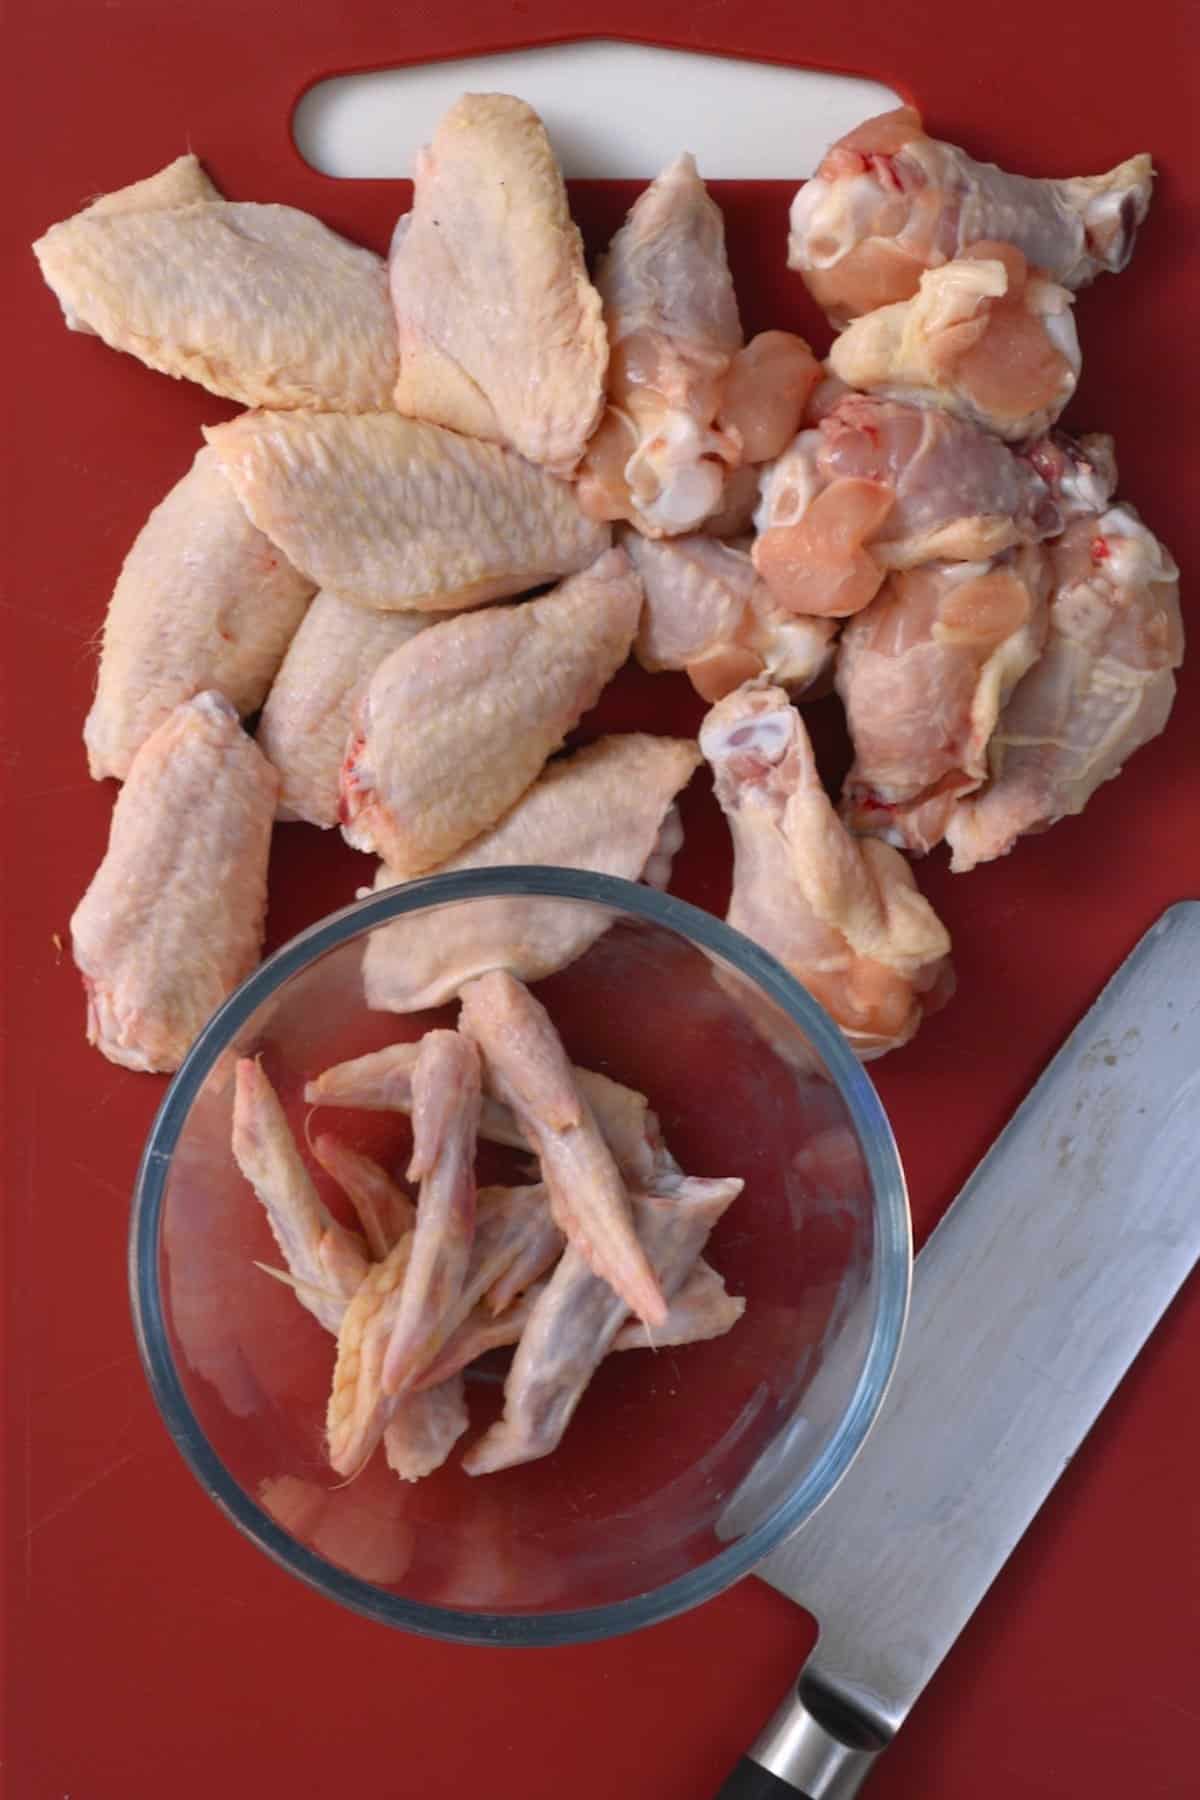
2. Remove the Tips
Begin by removing the wing tips. These are the small, pointed ends of the wings. Using a sharp knife, make a cut where the wing tip meets the drumette (the larger section of the wing). Discard the tips or save them for making chicken stock.
3. Separate the Drumette and Wingette
Next, separate the drumette from the wingette. Find the joint between the two sections and use your knife to make a cut through it. This will allow you to easily separate the drumette and wingette.
To make this step easier, you can also use your knife to locate the joint and then twist the sections apart with your hands.
4. Optional: Remove the Skin
If desired, you can remove the skin from the chicken wings. This can help reduce the fat content of the dish and create a crispier texture. To remove the skin, gently insert your knife between the skin and the meat, then use your fingers to peel it off.
5. Rinse and Dry
After cutting and separating the wings, rinse them under cold water to remove any remaining blood or bone fragments. Then, pat them dry with a clean towel or paper towels.
| Part of the Wing | Description |
|---|---|
| Wing Tip | The small, pointed end of the wing. |
| Drumette | The larger section of the wing, closer to the body of the chicken. |
| Wingette | The smaller section of the wing, farther away from the body of the chicken. |
By following these steps, you can properly cut and break down chicken wings for your desired recipe. Whether you’re grilling, frying, or baking them, you’ll have well-prepared wings that are ready to be cooked and enjoyed.


