If you’re looking for a refreshing and smooth way to enjoy your coffee, then cold brew is the perfect solution. Cold brew is a popular brewing method that involves steeping coffee grounds in cold water for an extended period of time. The result is a flavorful and less acidic coffee concentrate that can be enjoyed on its own or mixed with milk or water. Making cold brew at home is incredibly easy and requires just a few simple steps.
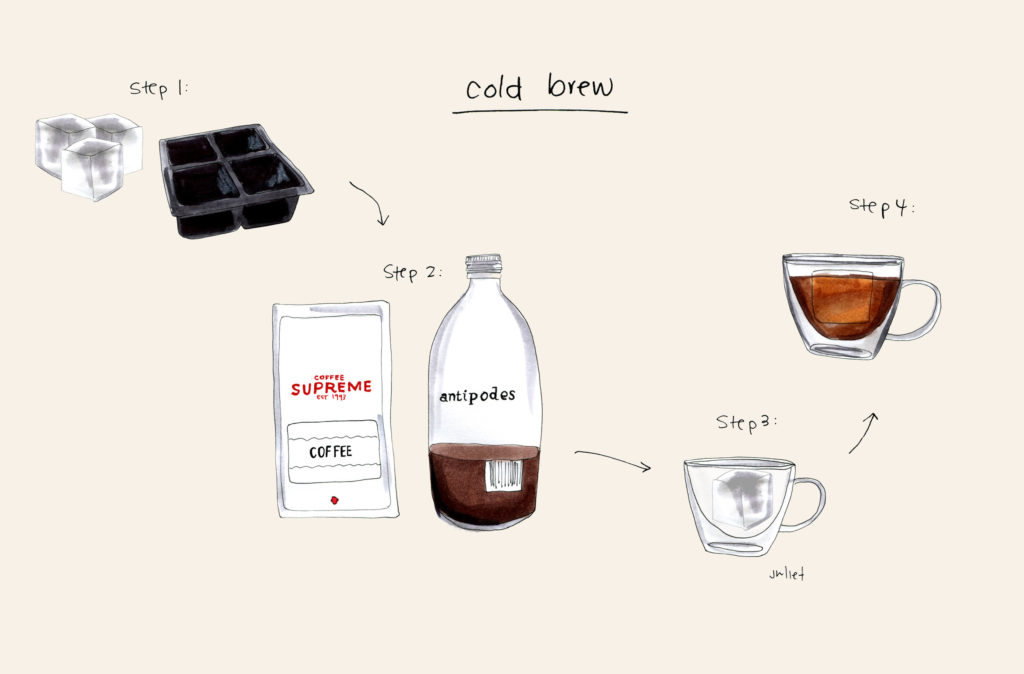
Step 1: Gather Your Supplies

Before you begin, make sure you have all the necessary supplies. You will need:
- Coffee beans or grounds: Choose a high-quality, medium to coarse grind coffee for the best results.
- Filtered water: Cold brew is all about the water, so be sure to use filtered water for the best taste.
- A container: A mason jar or a French press works well for making cold brew.
- A fine mesh strainer or cheesecloth: You will need this to strain the coffee concentrate.
Step 2: Brew the Coffee
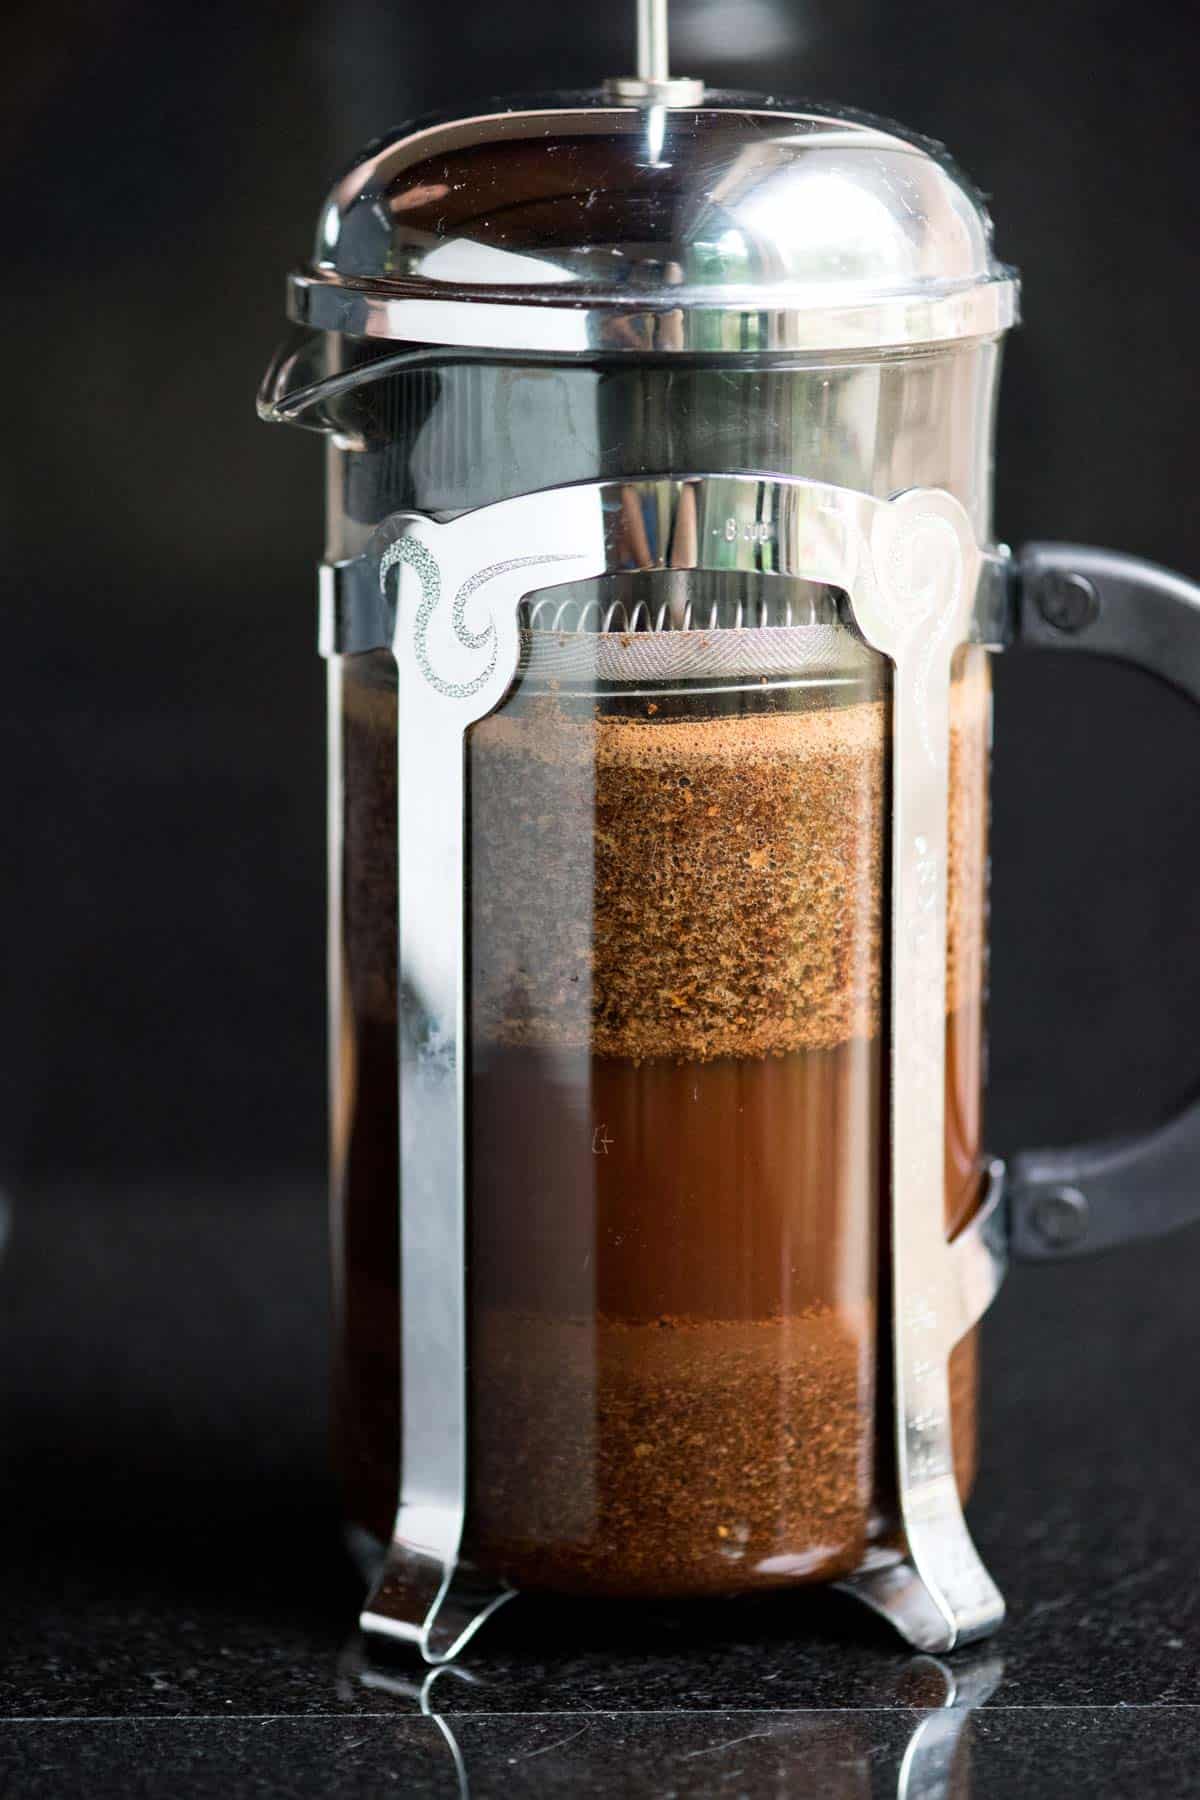
To make the cold brew concentrate, simply combine the coffee grounds and filtered water in your container. The general ratio is 1 part coffee to 4 parts water, but you can adjust it to your preferred strength. Stir the mixture to ensure that all the grounds are fully saturated, then cover it and let it steep in the refrigerator for 12 to 24 hours.
Step 3: Strain and Enjoy
After the steeping time is up, it’s time to strain the coffee concentrate. Place your fine mesh strainer or cheesecloth over a clean container and pour the cold brew through it. This will separate the grounds from the liquid concentrate. Once strained, your cold brew coffee is ready to be enjoyed! You can dilute it with water or milk, or even serve it over ice for a refreshing pick-me-up. Store any leftovers in the refrigerator for up to a week.
Making cold brew coffee at home is a simple and rewarding process. With just a little bit of patience and the right supplies, you can enjoy a delicious and refreshing cup of cold brew whenever you want. So why not give it a try?
Step 1: Gather Your Supplies
- Coffee Beans: Start by selecting high-quality coffee beans that are specifically meant for cold brew. These beans are usually coarsely ground and have a rich flavor profile.
- Water: Use filtered water to achieve the best taste. It’s important to note that the water-to-coffee ratio greatly affects the final flavor, so choose your water carefully.
- Mason Jar or Container: Find a clean and airtight container that can hold a sufficient amount of coffee and water. A mason jar is a popular choice due to its sealable lid and large capacity.
- Coffee Filter or Cheesecloth: You will need a filter or cheesecloth to strain the coffee grounds from the cold brew concentrate later on. Make sure your chosen filter can effectively remove all the sediment.
- Measuring Utensils: precise measurements are crucial to produce consistent results. Use a measuring cup or a scale to accurately portion out the coffee and water.
- Refrigerator: Cold brew coffee requires a lengthy steeping process, so you will need a refrigerator to store your container during this time. Make sure you have enough space.
By gathering these supplies, you’ll be well-prepared to proceed to the next step of making cold brew coffee. Remember that the quality of your materials will greatly affect the flavor and overall experience, so it’s worth investing in good beans and reliable equipment.
Step 2: Prepare the Cold Brew
- Measure the coffee: Begin by measuring out your desired amount of coffee grounds. A general rule of thumb is to use a 1:4 coffee-to-water ratio, but you can adjust this to suit your taste preferences. If you prefer a stronger brew, you can increase the amount of coffee, and if you prefer a milder brew, you can decrease it.
- Combine the coffee and water: In a large container or pitcher, combine the measured coffee grounds and filtered water. Stir gently to ensure all of the coffee grounds are evenly saturated with water.
- Steep the mixture: Cover the container or pitcher and let the coffee and water mixture steep for at least 12 hours, or overnight. This allows the flavors to develop and the coffee to extract slowly, resulting in a smooth and less acidic brew.
It’s important to note that the steeping time can vary depending on your personal preference. If you prefer a stronger and bolder flavor, you can increase the steeping time to 16-24 hours. Experiment with different steeping times to find the perfect balance for your taste buds.
During the steeping process, you can choose to leave the mixture at room temperature or refrigerate it. Both methods work well, but refrigerating the mixture can help slow down the extraction process and produce a smoother and more balanced flavor.
Step 3: Enjoy Your Cold Brew Coffee
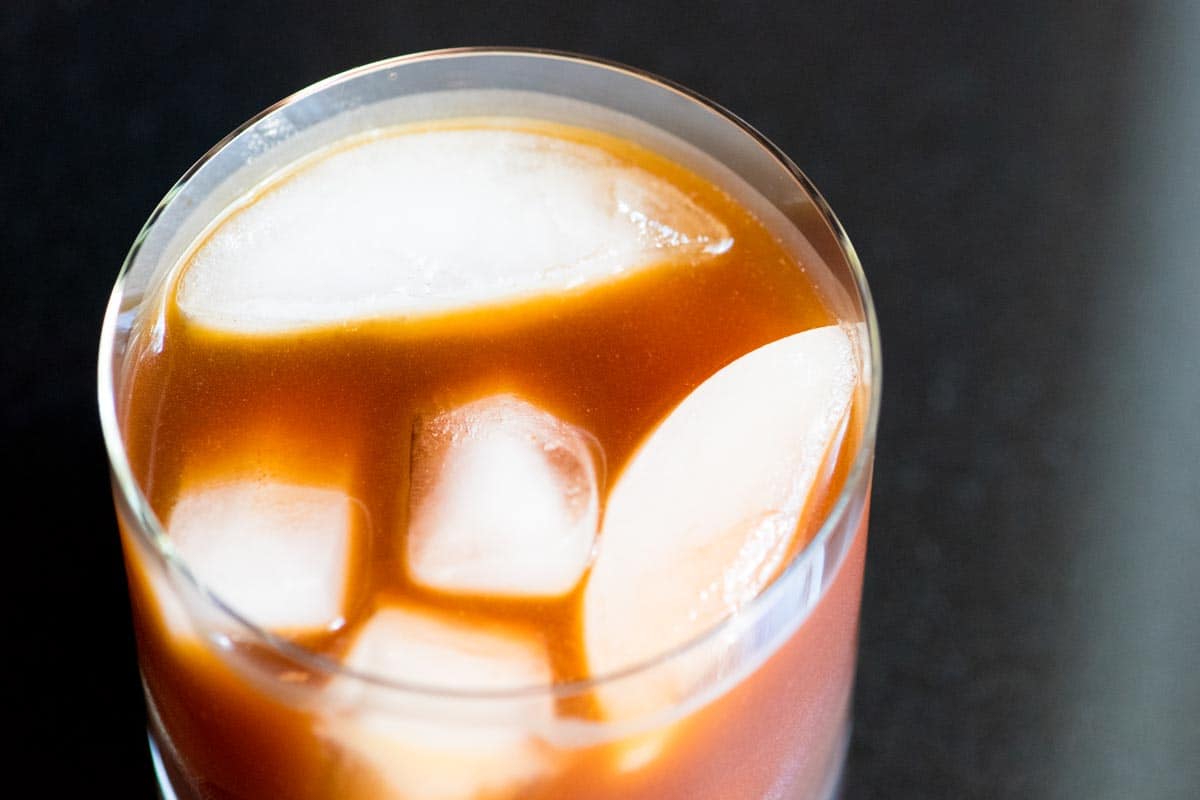
1. Serve it over ice: Cold brew coffee is best enjoyed over ice to enhance its cooling and refreshing qualities. Fill a glass with ice cubes and pour the cold brew coffee over it.
2. Add your favorite milk or sweetener: Customize your cold brew coffee to suit your taste preferences. You can add a splash of milk or cream to create a creamy texture, or sweeten it with a bit of sugar, honey, or flavored syrups.
3. Experiment with flavors: Cold brew coffee can be a great base for various flavor combinations. You can try adding a dash of vanilla extract, a sprinkle of cinnamon, or a drizzle of caramel syrup to enhance the taste and aroma of your cold brew.
4. Pair it with a snack: Cold brew coffee pairs well with a variety of snacks, such as pastries, cookies, or even a simple piece of chocolate. The smooth and slightly sweet taste of cold brew coffee can complement the flavors of your snack and create a delightful treat.
5. Store any leftovers: If you have any cold brew coffee left, you can store it in the refrigerator for up to 1 week. Make sure to transfer it to an airtight container to maintain its freshness.
By following these tips, you can savor the rich and smooth taste of your homemade cold brew coffee and experience the perfect summer refreshment.


